The Forty Dollar Make-Over

A forty dollar make-over may sound too good to be true, but a little can go a long way to lifting your spirit or giving you a fresh new seasonal look.

I doubt that I would have found my forty dollar duvet set had I made a special trip to find it.  Because I am often in home goods stores looking for things for clients, kids or myself, I was able to spot an appealing set that fit my color palette.  It made the journey more fun, and somewhat serendipitous.

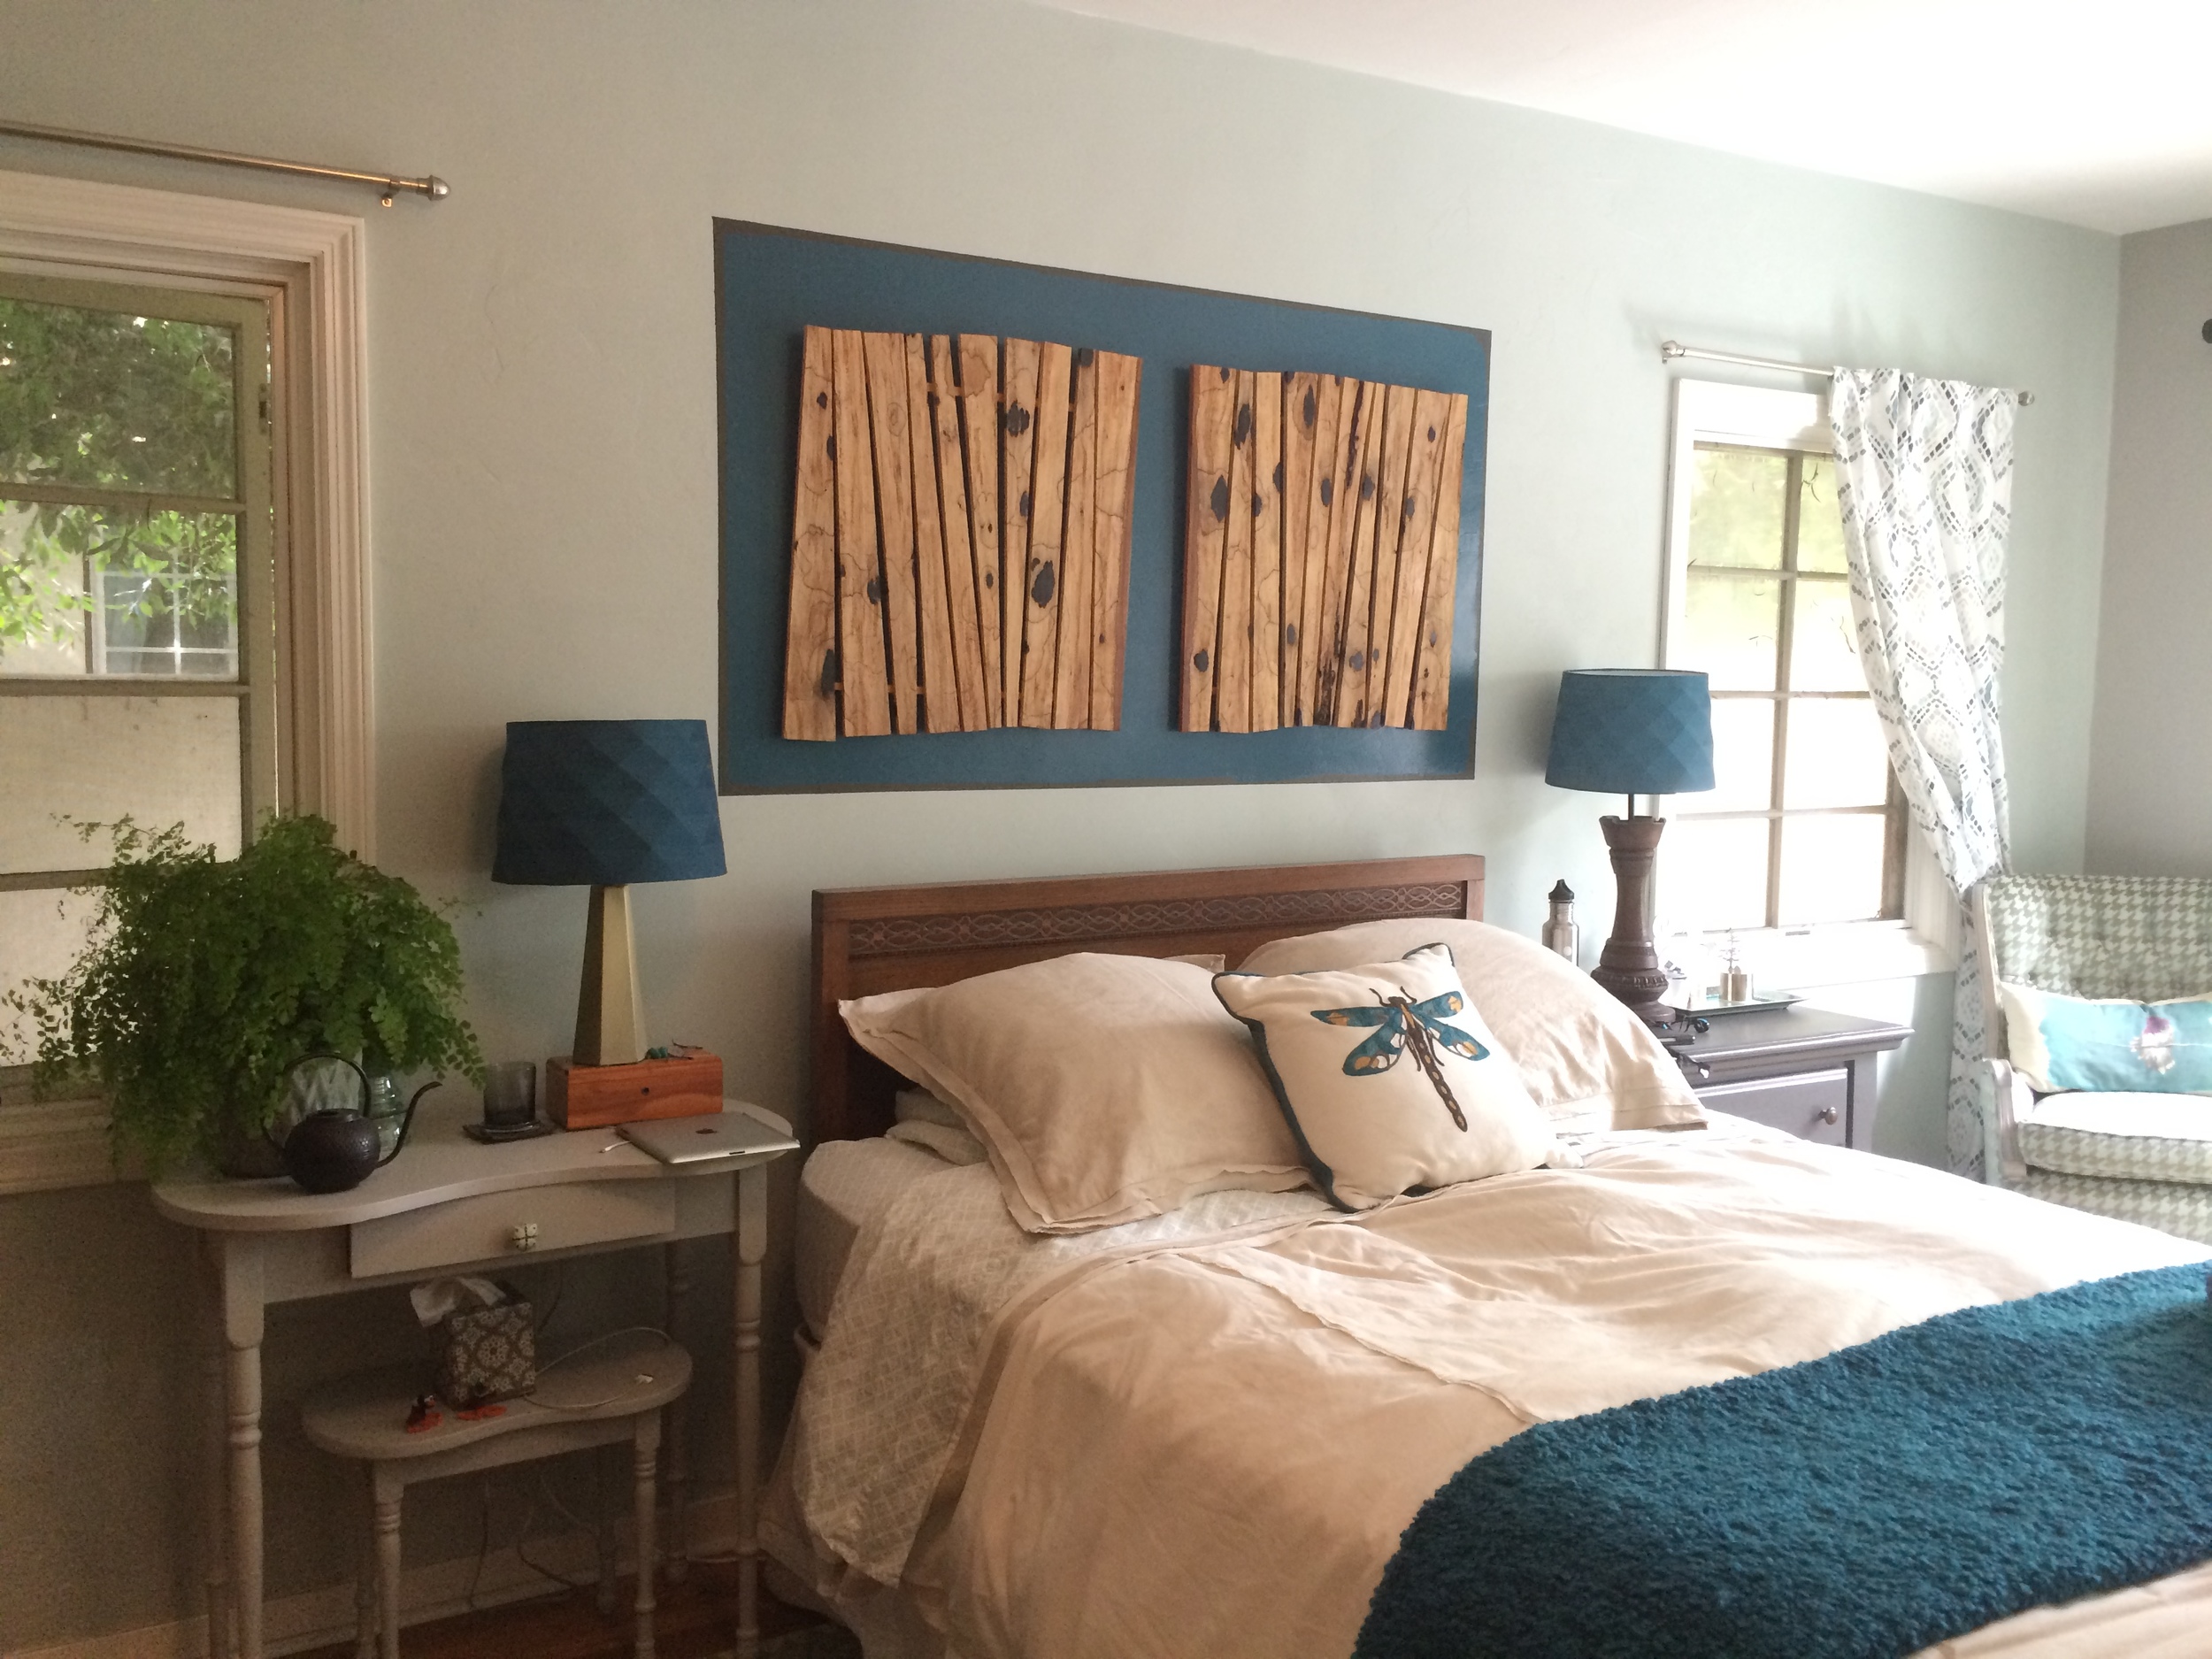
Knowing your color palette helps you find accessories for your rooms that will work instantly for your space.  Far from being dull, your color palette will offer you great opportunities to make small or subtile changes and even seasonal changes that will coordinate with your decor.  

Living in neutrals helps the process as well, but do not think in terms of white or beige as being the only neutrals—far from it.   When I think of color, I have a huge spectrum from which to choose.  People not accustomed to color, tend to think in terms of primary and secondary colors only.  When I suggest green to clients, too often the first color that comes to their mind is grass green.  Primary and secondary colors are great in some situations, but to live in them would be difficult for most people.

Just about any color is more sophisticated if it is toned down with to a grayer tone, i.e. a gray green is easier to live with than grass green; and there are lots of great options to bring a pop of color into the room with the use of textiles, art and painted furniture.  Making accent color changes is also much easier when using a grayed down version as the main color.  A gray green room, will come to life with accents of poppy red or chartreuse.  A bold bright blue or yellow, are also great choices.

Building a room from your color palette by adding layers of colors through artwork and textiles is surprisingly easy when you find art and textures that you love.  If you have been collecting fabrics or art, you will probably recognize a pattern.  You will find that much of your collection is similar in color.  You are drawn to certain colors, look at your wardrobe, besides the basic black, you will no doubt find you are drawn to warm or cool colors, and those will be colors you are most comfortable wearing.

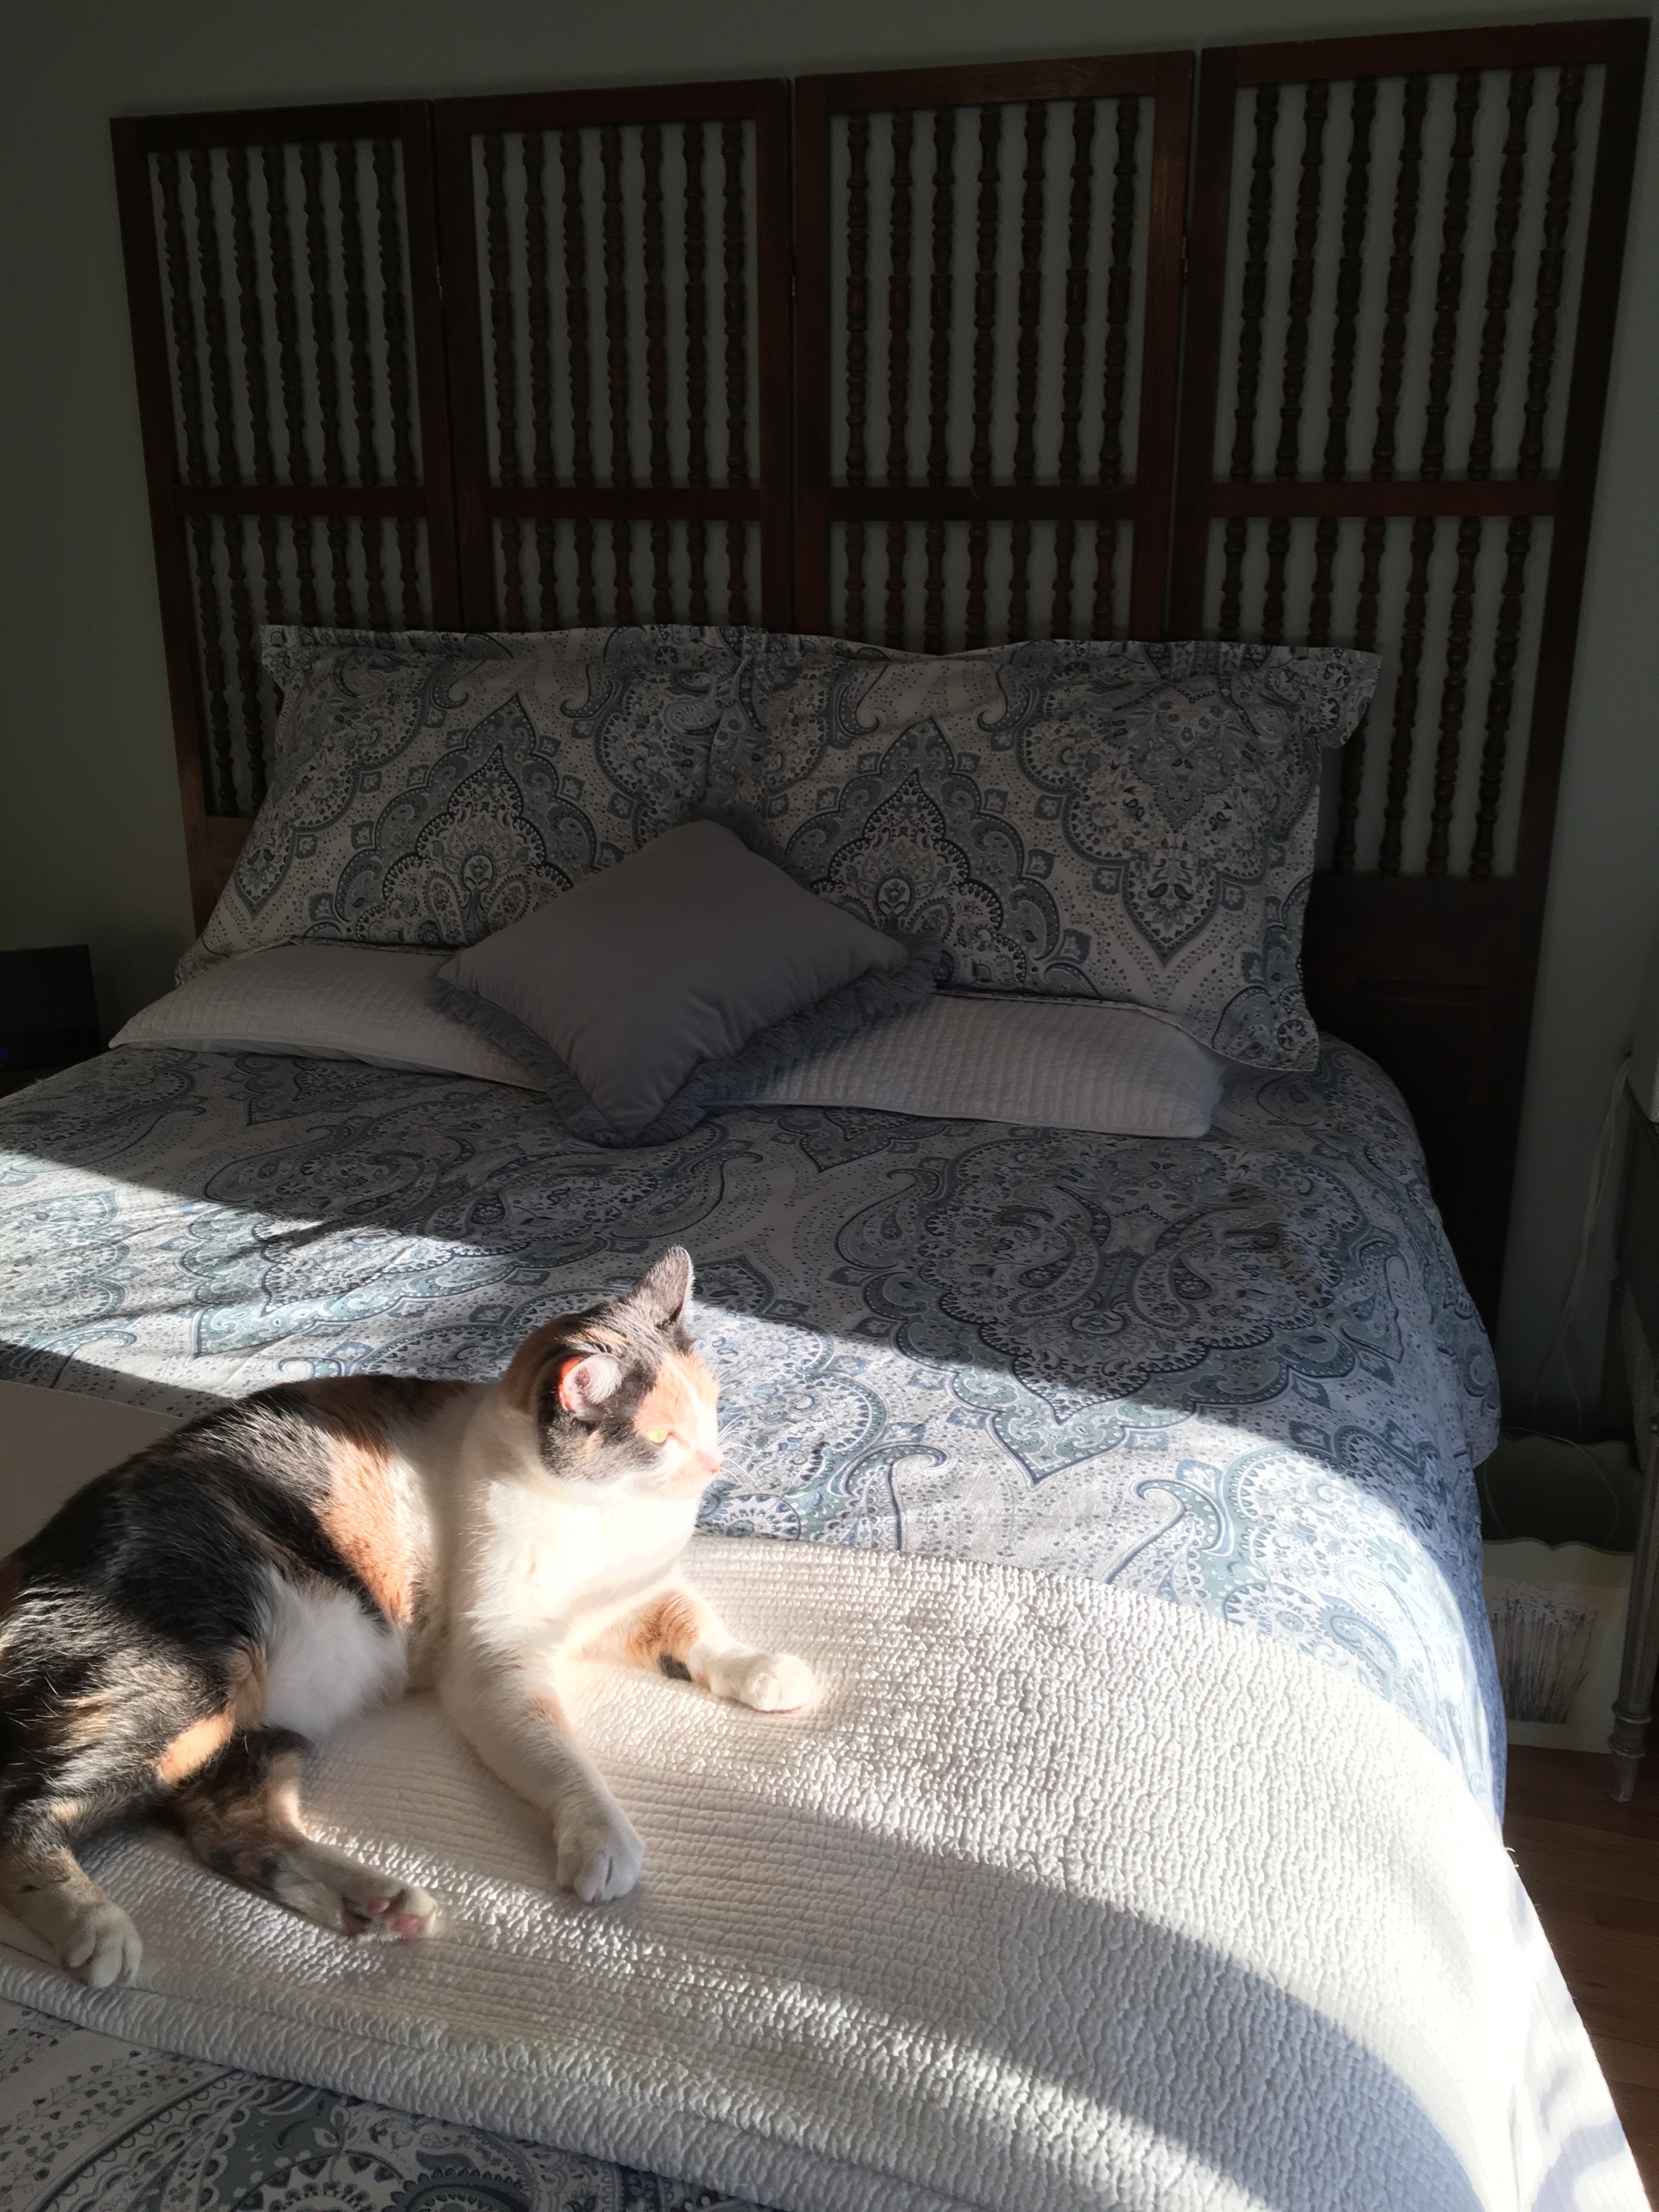
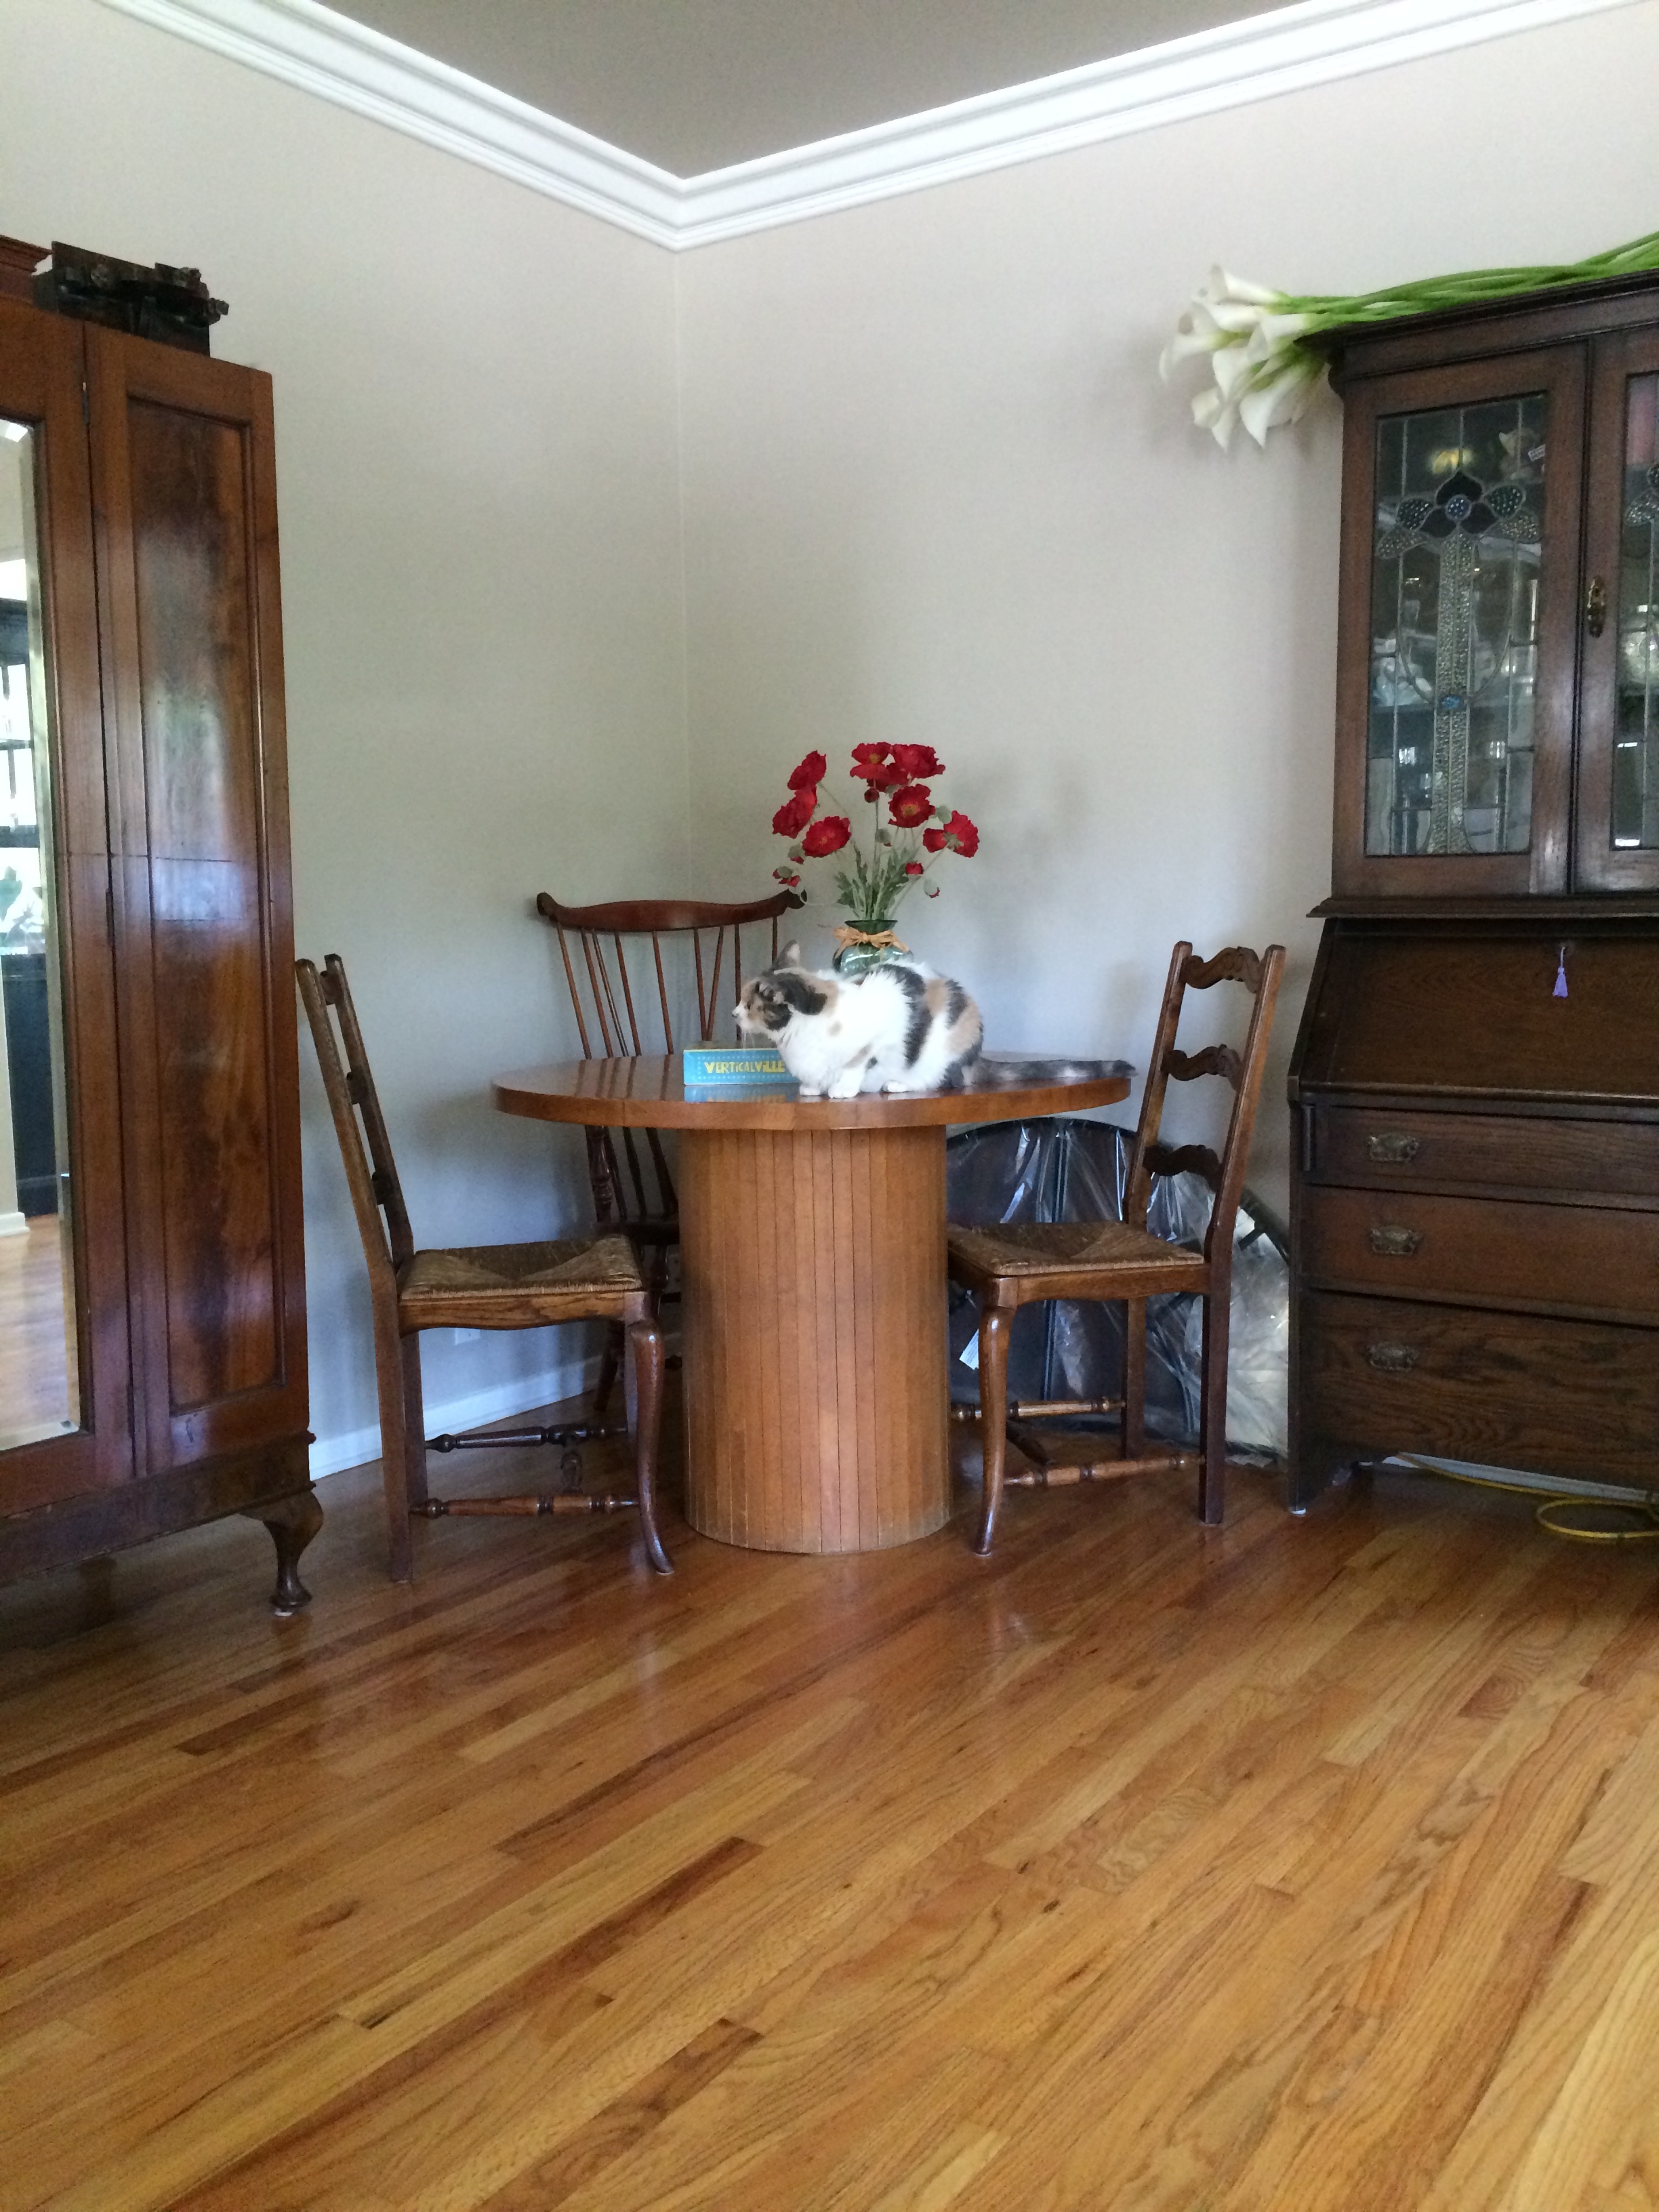
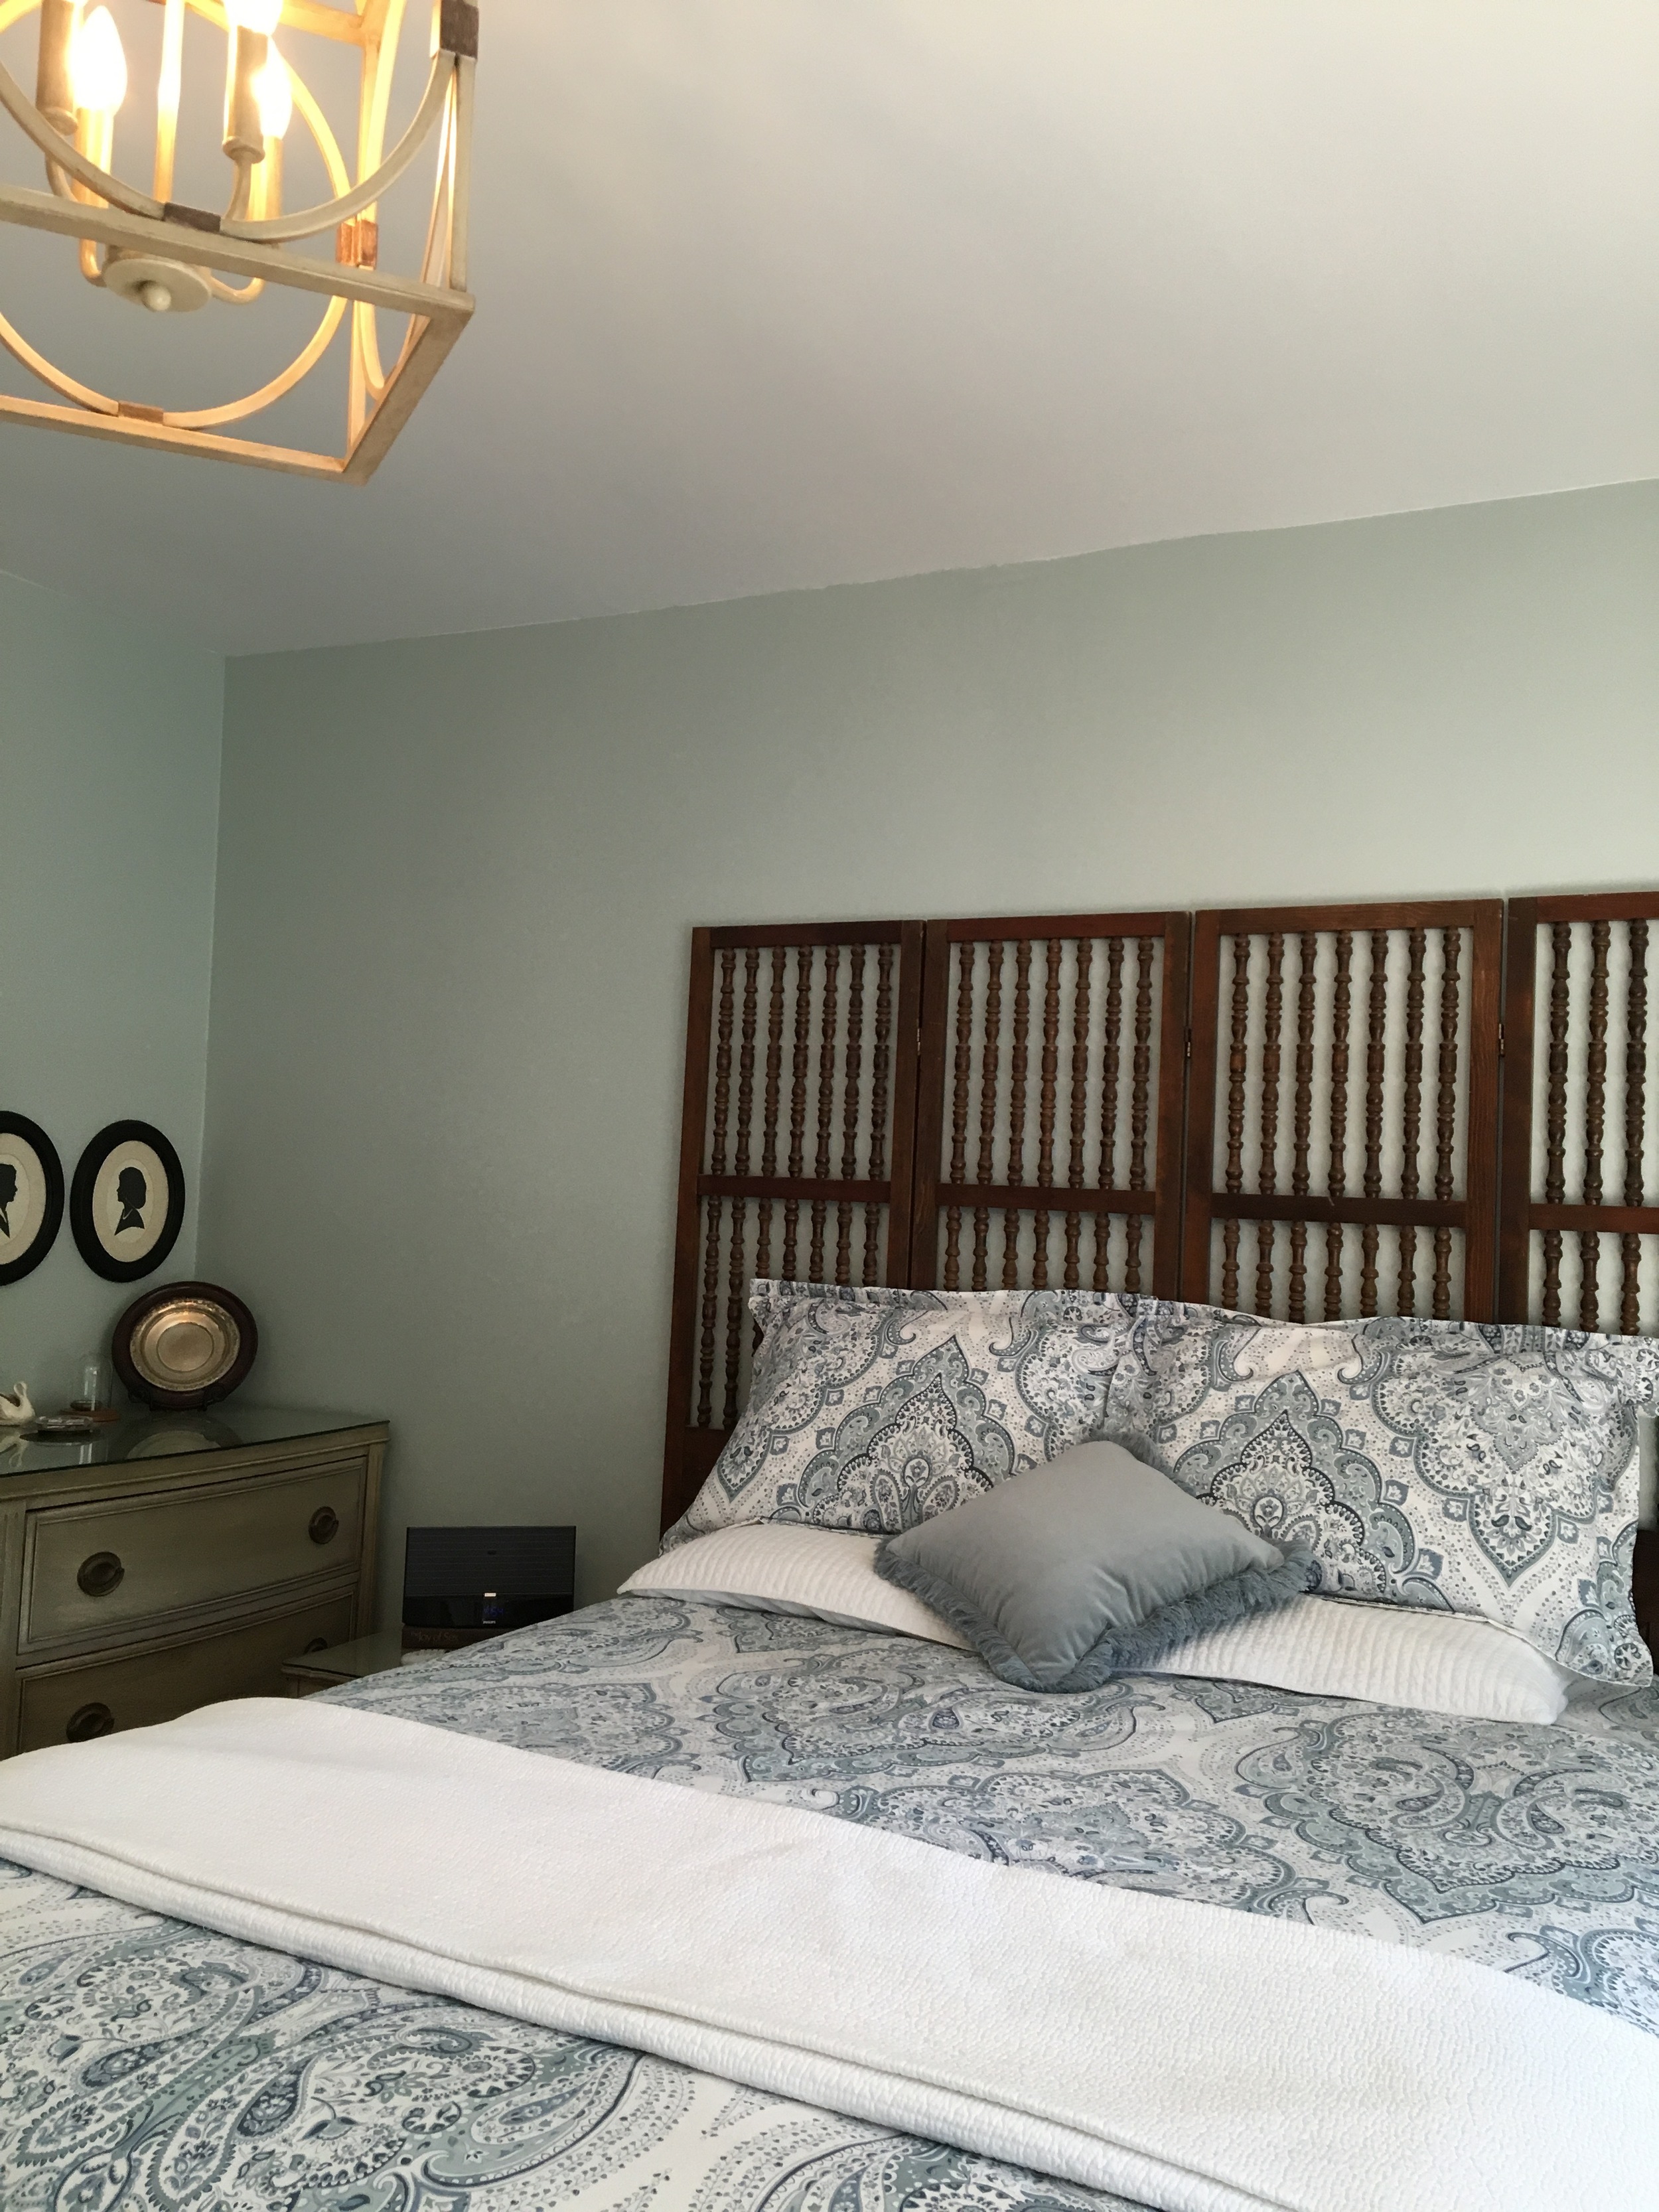
I knew I wanted something brighter than the soft, gray, green of my bedcover.  It was a solid, textured piece, and I was just a bit tired of it.  I still like it and will use it; but for summer I wanted something brighter, with a white background, but it had to be washable.  I live with two cats and one of them loves to rest on the bed during the latter part of the day, so washable is important to me.

Finding your color palette is daunting for many, so calling in a professional will save hours of frustration, and hopefully open your eyes to many more options— like accent walls.  It’s all about proportion, intensity and light.  You must know the light you live with in order to feel comfortable with your color choices.  Do not be afraid to try different color combinations and patterns.  Remember when it comes to paint color, it’s only paint; you can change it.

Hall Cabinet Update

After, the peeling, sanding and priming of the hall cabinets, the spraying commenced.  The spraying was easy since the door and drawer fronts were simple and flat.  I love the smooth texture over the old stippled roller texture.  New hardware in a sharp contrast and better scale than the old, made a big difference.  The old 1938 hidden hinges turned out nice and I like the nod to the past.  Here are a few before and after photos.

IMG_5901.JPG

Cabinet Project Progress

Sometimes I feel as though I am not making any progress with my many projects.  I imagine that many people experience feelings of failure because they never get a project started.  It is best not to look at a project as a source of failure from the start; no one would ever get anything done.

The mud-room/laundry at my daughter’s house is a case in point.  While it is almost finished, it is not quite there.  Painting the doors was a long, hard lesson, but a valuable one in many ways.  The project started when we, The Hammond Amish Construction Company (Amish, only in the sense that we are an all hands on deck kind of family when it comes to projects), tore out layers of old vinyl and linoleum flooring and laid slate tiles throughoutthe kitchen and into the newly expanded mud-room/laundry.  

The following holiday, we gathered again; and the guys got the IKEA cabinet boxes installed over the refrigerator and stackable washer/dryer, and alongside both appliances.  The semi-custom-built doors were made by a company that specializes in door fronts for IKEA boxes.  The next phase was the painting of the doors, which meant I needed to get the paint room— aka the Dexter Room— assembled, thanks to handy husband/dad.  Once that had been accomplished, I needed the sprayer to go on special, which happens twice a year, the spring and fall.  Come spring, I was ready;  or so I thought, as described in an earlier article.  The painting started off badly, because I was sold the wrong paint, the most difficult paint with which to learn this new process.  

However, we overcame the problem; and the doors are finished and installed—well most of them.  No project can go flawlessly; IKEA did not provide all the hinges we needed, or perhaps the correct ones for the two longest pairs of doors.

You may be wondering if I would ever be willing to tackle cabinet doors again. The answer is yes.  I began removing some cabinet doors from my hallway.  They are hung with 1938 hidden hinges, and are really interesting and minimalist for the day.  I think preserving them is important, but my hands may not agree.  I managed to get most of the screws out; but after watching my husband struggle, I knew I was in over my head trying to remove them myself.  Once the hinges were free, I began soaking them in a mini-crock-pot to help remove the years of paint.  

Next, I began the removal of the latest layers of paint,  starting with the latex paint that had been put over the older oil based paint from 1938 up to probably the 1960s.  I ended up peeling off the latex paint like peeling off wallpaper.  Most of it was stuck on with static electricity, I think!  Sadly, there was plenty that stuck like glue and I was able to remove it with an orbital sander.  Oddly, there were only about three layers of different colors, the latest being white latex.  I do not think the doors were ever primed.

I will remove all the door fronts from the hallway cabinets with the old hidden hinges and in the hallway where the laundry is, for preservation.  The door fronts are simple and flat.  There is not much to work around, other than getting the channels free of old sticky paint so the cabinets will close properly.  However, I am rethinking doing the same in the kitchen.  There are only a few doors fronts, and they have had newer hinges in place of the old original ones;  I may have new doors made, and save myself the aggravation of stripping the old ones.

I really do enjoy refreshing, refinishing and re-purposing old things, but there comes a time when I, like many other people, must decide if the effort is worth the work.  I will keep you posted on the project.  

As for my daughter’s mud-room/laundry cabinet doors, they look great and she is very satisfied with them; she still needs to get some cabinet hardware, which she will want to coordinate with the kitchen when those cabinets are replaced—and so it goes, a never-ending process to bring new life to old things.  

There is always a price to pay when considering refurbishing or replacing; you do need to weigh the pros and cons of any project, as well as judge your skills and the time that it will take to make it aproject well done.

The Beginnings of Design

We can debate when design began; but for me, it began with the creation of earth.  Whether you subscribe to the Big Bang Theory or more traditional Creation theories, design was there at the beginning.  As soon as man made an appearance on earth, evidence indicates that he made his mark on design.

So much of our current design ideas come from nature and culturally from what is available in a given region.  Man’s cave drawings and his need to create music are shown in every culture and place on earth where man has existed.

My inspiration for this topic began at a breakfast place when I saw a wallpaper in the distance and could not discern the pattern other than a stylized block print.  Upon closer inspection, I saw that the artist had used the silhouette of a rooster in a single color on a white background that formed a square pattern.  From a distance, it looked like a slightly elaborate geometric pattern, when in fact it was a simple barnyard animal.  Very clever!

We have just returned from Phoenix where we visited the Musical Instrument Museum, a fascinating place that will interest people with musical leanings or for those who only play the radio.

What fascinated me was the evidence of ornamentation on even the most simple and sometimes crude musical instruments from the earliest times.  It is not surprising that design for the sake of design improved and became more intricate and elaborate as cultures became more sophisticated.

One thing that did surprise me, was the presence of bagpipes in nearly every culture.  While the Scots are known for their bag- pipes, many cultures had some variation of the instrument.  Drums, pipes, horns and stringed instruments were found throughout history and again, every culture seemed to have some variation of them.  The use of animal skins as instruments, and as decoration was as interesting as the music they played.

Recognizing natural and ordinary objects that surround us helps us understand that art is everywhere. So many things can be interpreted as an art form.

The designs found on the musical instruments show us that making beautiful music is not enough; we need to make the actual instrument beautiful as well.  Sometimes, it is simply the form, like a violin with its sensual lines, that helps create the beautiful sounds, along with the particular wood and finishes that help the sound resonate.  However, I think most people would agree it is a beautiful instrument; it is used to play classical sounds or the fun, country fiddle sounds that make everyone want to move, clap their hands and stomp their feet.

Nearly everything that man touches shows signs of his ability tocreate design whether it is for function or simply for beauty.  We never would have reached the moon without design.  Without nature, it is unlikely we would have found flight possible; following the flight of birds and incorporating their form and aerodynamics is truly a thing of beauty and an undeniable art form.

Look around you and identify how art is in everything we use.  Man needs to express himself in artful ways, a most basic expression along with making music.

To Hire A Professional or Not

My latest endeavor has been an exhausting task to say the least.  I plan to add a new phase to my business.  The Dexter Room was the first step in creating a space to spray paint cabinet doors.  Purchasing an HVLP 9.5 paint sprayer was the second and expensive part of this mission. The learning curve came next.  I am a very experienced painter using a brush or a roller; I paint walls, cabinets, shutters and furniture.  

I have spray painted small projects successfully, using cans, but I do not consider such painting a practical way to tackle kitchen cabinet doors.  I needed to develop a new skill; and while I knew I needed new techniques that would develop with experience, and I even expected a slow learning curve, I did not expect to regress.

I have talked with my paint representative, paint technical support and spray machine representative, but none have given me a definitive answer for my problem.  I have watched countless U-Tube videos on-line and read blog after blog hoping for more insight.   I am not sure it is my skill level that is at fault or even the weather, which can affect the way paint lays on a surface.  My next move is to talk-face-to-face with a professional (again) about the spray gun, which has been suggested to me as the culprit.

My personal story is to remind you that there are reasons to pay a professional to do tasks at which you are not proficient.  We all have gifts or skills that are valuable, but it is wise to recognize when your life will be improved by hiring a professional as opposed to doing a project yourself.  

I am grateful to my CPA every tax season; doing taxes is 180 degrees from my area of expertise.  I know that hiring an interior designer is not in everyone’s budget, and many people feel that they can do as well.  After all, it is not rocket science, right?  However, it is a particular skill that not everyone possesses though it can be learned to some extent; but having a natural ability goes a long way, just like working with numbers.

It is an unfortunate time when you are faced with an electrical problem in your home, but you know well enough not to tackle it yourself unless you are proficient working with electricity; the results could be deadly.

Fortunately, that danger is not the case with decorating and design, but a bad job is sometimes much more costly in the end.  People who hire an interior designer usually have reached a point in their lives when they recognize that their home is not the comfortable retreat they have been trying to achieve on their own.  Many people can decorate a room using catalog pictures and recreating spaces that appear in magazines; and there is nothing wrong with doing so. However, this type of decorating does not reflect a homeowner’s personality, which is what a designer can achieve to make family members comfortable in their home.

A good designer can create a comfortable living space, using your actual room to bring scale, color and balance into play for a pleasing room.  Just like learning about electricity, there is a plan to design; and there are reasons for the choices a designer makes.  We need electricity in our homes, but we do not get too excited about wires in the walls or paying for it.  We prefer to get to the end product, the visual; so it is with design.

The next time you hire a professional, be it an electrician, a tax attorney or a designer, please remember that there are good reasons for their recommendations, and the reasons all have to do with the end product.  Sometimes the beauty is in not what you can see, as in the internal wiring that gives your family the heating and lighting needed for comfortable living; a good designer can bring visual comfort to a room with careful and sometimes clever choices.  Hiring an interior designer even for an hour or two consultation, can save you and your budget in the long run from making costly mistakes.

Spalted Maple Artwork

The wonders of nature never cease to amaze me.  On our trip to the wine country last month, my daughter and I visited a gallery and were mesmerized by some of the collections; but what captivated us and held our attention was the spalted maple turned to art.

The gallery representative was anxious to tell us that spalted wood is caused by a fungus that occurs primarily in dead trees, and the artist is careful to use only felled trees. 

Spalted wood is divided into three types: pigmentation, white rot and zone lines.  The artwork that my daughter bought is zone line spalting, which is characterized by thin lines of black surrounding heavy, black, irregular spots that appear very hard, almost like stone, called dark mycelium.  While all this is somewhat technical, the effect on the wood is simply beautiful, almost like thin ink lines shakily drawn around the heavy black spots.  In the gallery exhibit, the wood was cut into unevenly sliced slats and mounted on thin strips of wood to hold the piece together.  

My daughter bought the two pieces that were in the gallery to place over her bed’s headboard.  I suggested we paint a solid rectangle on the wall a very dark color to form a frame and place the work inside, the rectangle, of course, being larger than the two pieces together.  We did that, but once the art was up on the wall, it seemed too flat.  My daughter wanted more color, so we repainted the rectangle right over the original color, but without care to cover the sharp lines completely, while staying within the original shape.  She thought she would like to add a frame of molding to the painted on wall and paint it the same color, for texture.  Then she decided the irregular color on top of the dark color was interesting and she would leave it for the time being.

Artwork, of course, is a matter of very personal choice; fortunately we share similar tastes.  Her room is coming together nicely and I think she is beginning to feel it is just about right.

If you look up spalted wood on the Internet, you will see some amazing pieces of art, that are not only beautiful but useful too.  Spalted wood is used for musical instruments, bowls, tables and cabinets.  Some of the images show inlays of turquoise and metals.  Artists find uses for this wood in jewelry and furniture; their creativity seems endless.  Please be sure to take a look, next time you are at your computer, I think you will be amazed at this oddity of nature.

Reclaimed Wood Shelves

The pretty bathroom that we added onto my daughter’s house a couple of years ago has been finished for sometime, with the exception of some reclaimed wood shelves she had always wanted to add.  We spent some time researching reclaimed wood, drove to a salvage business in downtown Los Angeles, and found what might be a good fit.  Then, as other projects moved forward, the salvaged shelves were put on hold.  

Finally, the wood was purchased, and the shelves were added to the area above the commode.  My daughter wanted this rustic look to relate to the natural weave of her laundry basket and to add some relief to the fancy turned legs of the reclaimed dining room buffet we made into her vanity with the addition of a vessel sink.   The beautiful faucet set and vanity, along with the custom tile band for the shower, are the show stoppers in the bathroom.

The ceilings are tall in her 1930s Spanish home, and my daughter felt the commode area needed a little special attention.  She added the stenciling on the commode wall for a little sparkle, which adds to the elegance of the rest of the bathroom; the rustic shelves are a juxtaposition to this design element.

Dressing the shelves was the next project.   We found a fun little wire basket at the “Junk Bonanza” in Del Mar a couple of weeks ago in which she could store her spare bath towel.  Then she added some of her favorite things from trips abroad and down under.  The memorabilia are a nice reminder of fun trips and outings with friends and family.

Additionally, we picked up some fun pieces during our salvaging outings.  We picked up vessels for planting succulents on the patio along with an old bedspring she will use as a planting screen for added privacy behind her outdoor patio furniture.  I will share more about these and other items in another article, so stay tuned for more of our salvaging exploits.

Window Grate Reinvented

Some weeks ago, I went to a salvage store and found an old, exterior, decorative window grate that I thought would make a good interior dog gate.  I did not want to have a typical dog or baby gate because I did not want to store it or have an unsightly gate permanently attached to the door jam; besides the wall could use a little dressing up, I thought.

I knew my handy husband would not be thrilled with another kooky idea of mine and then have to adapt it, so before I even decided to buy the grate, I made a plan.  That plan would not involve my husband initially, only later to attach it to the wall.  The grate was a little too large for the door opening, and would require cutting down the iron material.  I knew just where I was going to start for that project.  Unfortunately, the first guy sent me up the street a few doors, and those guys sent me next door to a fellow who would do the cutting and welding of the hinges, but wanted a detailed plan;  he then offered had a cousin would could make me a gate.  I was not deterred!  I had yet another source; however, my husband took the grate out of my car, thinking he was doing me a favor.  I told him my plan, and he decided he’d do the project—exactly what I did not want to have happen; he has many projects on his list and this is not one I wanted to have him tackle at this time.  Apparently, it was one he wanted to do.

Once he cut the grate down to fit the doorway, he used a metal epoxy to fix the hinges to the grate, let it dry and set, then he screwed it to a wood slat he screwed to the wall, perfect.  Now the dogs cannot get to cats who prefer not to socialize with the canine kind.  

This gate was a good solution to the problem of having to keep pet species separated and wanting to keep the area easily accessed by the humans who tend to them.  Someday, I hope to have cats that accept the dogs, but I do not think that will happen with these cats; they were not raised with the dogs, and the cats were here first.

Imagine all the places this window grate could be incorporated easily— certainly outside for a similar solution to keep pets out of a garden area or kids for that matter.  The grate was inexpensive and that was appealing; besides, it was close to the right size and had at the look I wanted.

Stay tuned for what my plans are for the unsightly area behind the washer and dryer, a work in progress.

Semi-Custom-Made Blinds

Finding suitable window treatments for my living room was a concern for me.  I wanted something that would give us a little privacy at night, and disappear during the day, but be attractive all the time.  When I did my first design project back in the 60s, I got high marks for using matchstick blinds, and trimming them with decorative fabric trim tape.  During that period, there was a bit of a Bohemian vibe, and matchstick blinds were easy to acquire, hang and decorate, not to mention inexpensive, too.

I have continued to use matchstick blinds throughout the years, sometimes sacrificing most of the blind to make simple valances— where full coverage of the windows was not necessary— but still giving the impression of window treatments.

In the early days, I did not use liners with the blinds; they were not in an area that required privacy.  In my previous office that faced east, cutting the bright morning sunlight and heat made lining a must.  Once the sun rose above the blind area of my view, I could easily raise the blind and enjoy the view.  

My current living room faces the street, and I felt too exposed to do without any window treatments.  I had considered a lightweight wool drape for the window; but with an east facing window, I felt it would require a lining, which would make the drape too heavy to fall nicely and would add considerably to the already expensive wool fabric.  Besides, wool would be more formal than I wanted.

Matchstick blinds were a little harder to find this time around.  Once I got the requisite sizes, color and number I needed, it would be up to my handy husband to cut them to size—standard was not going to work in my space.  The cutting down of the blinds would be put off for sometime, since it required the use of his table saw, which had not found a place to operate right away.  Bummer!

The trick to cutting down matchstick blinds, is to roll them tightly and use a new, fine tooth, sharp blade.  In days gone by, he used painters tape to hold the blind while he cut it to size, but this time he thought of using hose clamps.  Brilliant.

Once the blinds were cut and fixed to the windows, I was delighted with them.  I wanted to live with them for a little while to see how I felt at night with lights on inside the house—still a bit exposed. 

The solution was to line them.  Again, there was nothing standard about the now customized blinds.  I bought some light-weight batiste fabric, trimmed it to size and hemmed all four sides.  Perfect.  Now to attach.  I began doing it by hand, but quickly decided that hand work would be too labor intensive; and my hands and back would not appreciate it.  I thought of using a nylon tag gun that is used to attach price tags to clothing, but would employ shorter nylon pins.  Fabric stores carry these guns.  They are called Quilter’s Basting Guns; however, I found that the nylon pins were red or hot pink, and that would not do for my project.  I went on-line and found the basting tool with shorter, clear pins; but had to wait for them to be delivered—over a holiday weekend.  

Once I had the basting tool, I was in business; and it worked like a charm!  I was particular about getting the lining up as high as possible and tacking it all along the top as well as the bottom.  Additionally, I pinned all the way down the liner and across the blind in neat rows, to ensure the liner would roll up cleanly; and from the outside it would appear smooth.

The end result is just what I wanted: the privacy issue is solved, and it feels cozy from the inside at night.  During the day, with the blinds raised, I love the light and the look of the blinds rolled up; it adds to our casual lifestyle, not so Bohemian since the blinds are unadorned.

Design and Function—The Beauty Within

Not everyone will agree on what beauty is, but it is one’s perception that counts; however function is a bit more concrete.  As a designer and decorator, I strive for both, it is in my DNA.  I know that not nearly as many people will find a storage shed a thing of beauty as will find a pretty fabric or the lines of a lovely chair; but to me, the shed illustrated here is a thing of beauty.

I do a great many painting and refinishing projects that add to the aesthetic quality of my life and the lives of my clients; so having a place to work on these projects is particularly important to me.  I wholeheartedly subscribe to the designer mantra that form follows function.

I purchased an eight-by-ten foot shed last fall, and my handy husband spent a couple of weekends getting it set up; first he built a frame for the foundation so the shed to sit level on the back patio that was sloping for drainage.  Suffice to say that he built the shed and foundation with his usual precision.  There are still some additions to install, such as lighting and a box fan for exhausting paint spray and fumes.

Fitting the interior with a tall, wire-frame shelving unit was key to storing the many cans of paint and other necessary supplies.  I thought it would be a good idea to wrap the wire-frame shelves with an insulation blanket meant for a water heater.  My hope it to help preserve the paint, which degrades in extreme temperatures— since the shed is not as well insulated as the garage.  Investment:  Insulation, $22, shelving unit was a donation from my daughter, $0. 

I bought a set of adjustable saw horses to hold a discarded, standard interior door; this serves as my work table. Investment:  Saw-Horses, $59, Interior Door, $0, Lighting, $140 and the Box Fan, $25.  The shed was certainly the most expensive, but I did get it on sale.  I do not remember what the pressure treated wood and flashing cost, but probably somewhere around $100+/-, and the labor was based on pure love which is priceless.

Without the lighting or the fan installed yet, the room has been a valuable addition.   My husband was the first to use it.  I insisted that he spray paint some auto parts for the restoration of our 1930 Model A, which has not seen any attention in 50 years!  Next up was the painting of a cabinet my daughter uses to conceal the litter box in a bathroom.  The shed, which we have nick named "The Dexter Room", has been deemed a great asset and in my mind, a thing of beauty. 

A word about the decision to purchase a pre-made shed; we looked into many less expensive options of which there are many.  First, was the least expensive, was inspired by the popular TV series Dexter but, involved assembly and take down after each use.  PVC pipe fitted to make a frame, and heavy sheet plastic sheeting attached to the PVC constituted the “room”, and would cost about $50.  I liked that, but from a realistic stand point, I didn’t think I could do the assembly by myself, and weather might be an issue.  The next idea was a simple pop-up tent, a bit more expensive, and certainly easy enough for me to assemble; but it would limit the size of the projects.  The ability to use the Dexter Room shed in just about any weather for large and small projects drove the decision to acquirea more formidable structure.  My daughter and I have plans to spray paint some custom doors for the newly installed cabinets in her laundry room; a couple of the doors are quite tall and require a fairly large area to work on them and allow a place for them to dry without interference.

From the outside, the shed is a pleasant enough looking piece, with a cottage look, but the interior is pure function.

Something Old Is New Again


After the excitement of Christmas and the clean-up aftermath, I set a new goal for myself:  to rid the living room of boxes of books that thus far have had nowhere to go. I had wanted to get a bookcase for the area the boxes occupied, but it would have to be low enough to allow in the lovely light from the window above.  A low bookcase would not be sufficient for the many boxes of books.  

The space where the boxes were stacked for the past six months is right beside the fireplace—a pretty prominent feature in the room— and the boxes were not at all attractive.  I have selected a place for tall bookcases— which will solve the book problem—but that is another story.

For more than four decades, I have had a cabinet always used just to fill space in our home.  It is an old Magnavox Hi-Fi cabinet that I gutted years ago to make it easier for me to move around.  It is a very traditional mahogany piece and has seen better days since it first came to us.  After our move, I decided it might be more appealing if it were painted.  It certainly was not valuable as an original cabinet with its insides removed.  It had some battle scars from early use as a stand for a small portable TV. Paint seemed to be in order.

I had considered a black and gray combination, or a turquoise; turquoise won.  At first, it seemed too bright and lacking in depth, so I added some antique glazing; that was better.  Still not sure before Christmas what to do with it, I first put it in the spare room and let the holidays occupy me.

Come the new year, my daughter suggested I try using the old, painted the cabinet in the space beside the fireplace until I found something better; it certainly would fit.   I decided that the cabinetwould allow “Sophie” the cat, a more stable place in the sun to view the dogs next door; the boxes of books were sinking under her weight!  It also would add a bit of color in a room that already has a lot of wood furnishings.

I was not thrilled with the cabinet even after the paint; it just was not something I thought I would use again, but using it under the window was a good idea, so why not give it a chance.  Just when I thought I would kick it to the curb and see who might pick it up, it was spared that humiliation and has a place in our home once again.

The moral of this story is not to give up on a piece just because it is old and worn.  Paint can revive just about anything and bring new life to an old piece.  Who knows? It looks good enough to stand the test of time for another few decades.