The Art of Stretching A Door

It’s been a long time since I posted anything about the guest room makeover, so long that I forgot I had started to write about it back in January of this year.

It has been a long five months in the making…but it is finally habitable— not completely finished, but livable at least.

One of the primary things that needed to be installed was a door to cover the opening for privacy between the guest room and my husband’s office.  We actually found an entry door back in November and decided it was just the ticket for our sliding door. Except the door was a standard 6’8” door and the opening was standard for a typical inset door, to cover the opening it needed to be s-t-r-e-t-c-h-e-d for full coverage.

My handy husband began cleaning up the door that is 80+ years old, by filling the door handle, lockset and deadbolt openings, sanding down much of the eight to ten layers of paint and adding about three inches to the bottom of the door.  I think he used poplar to extend the door; this was done by cutting and glueing pieces together to make the extension.  Once the door had been made to the exact size to hang over the opening and offer complete coverage, top and bottom and side to side, it was nearly ready for priming.  

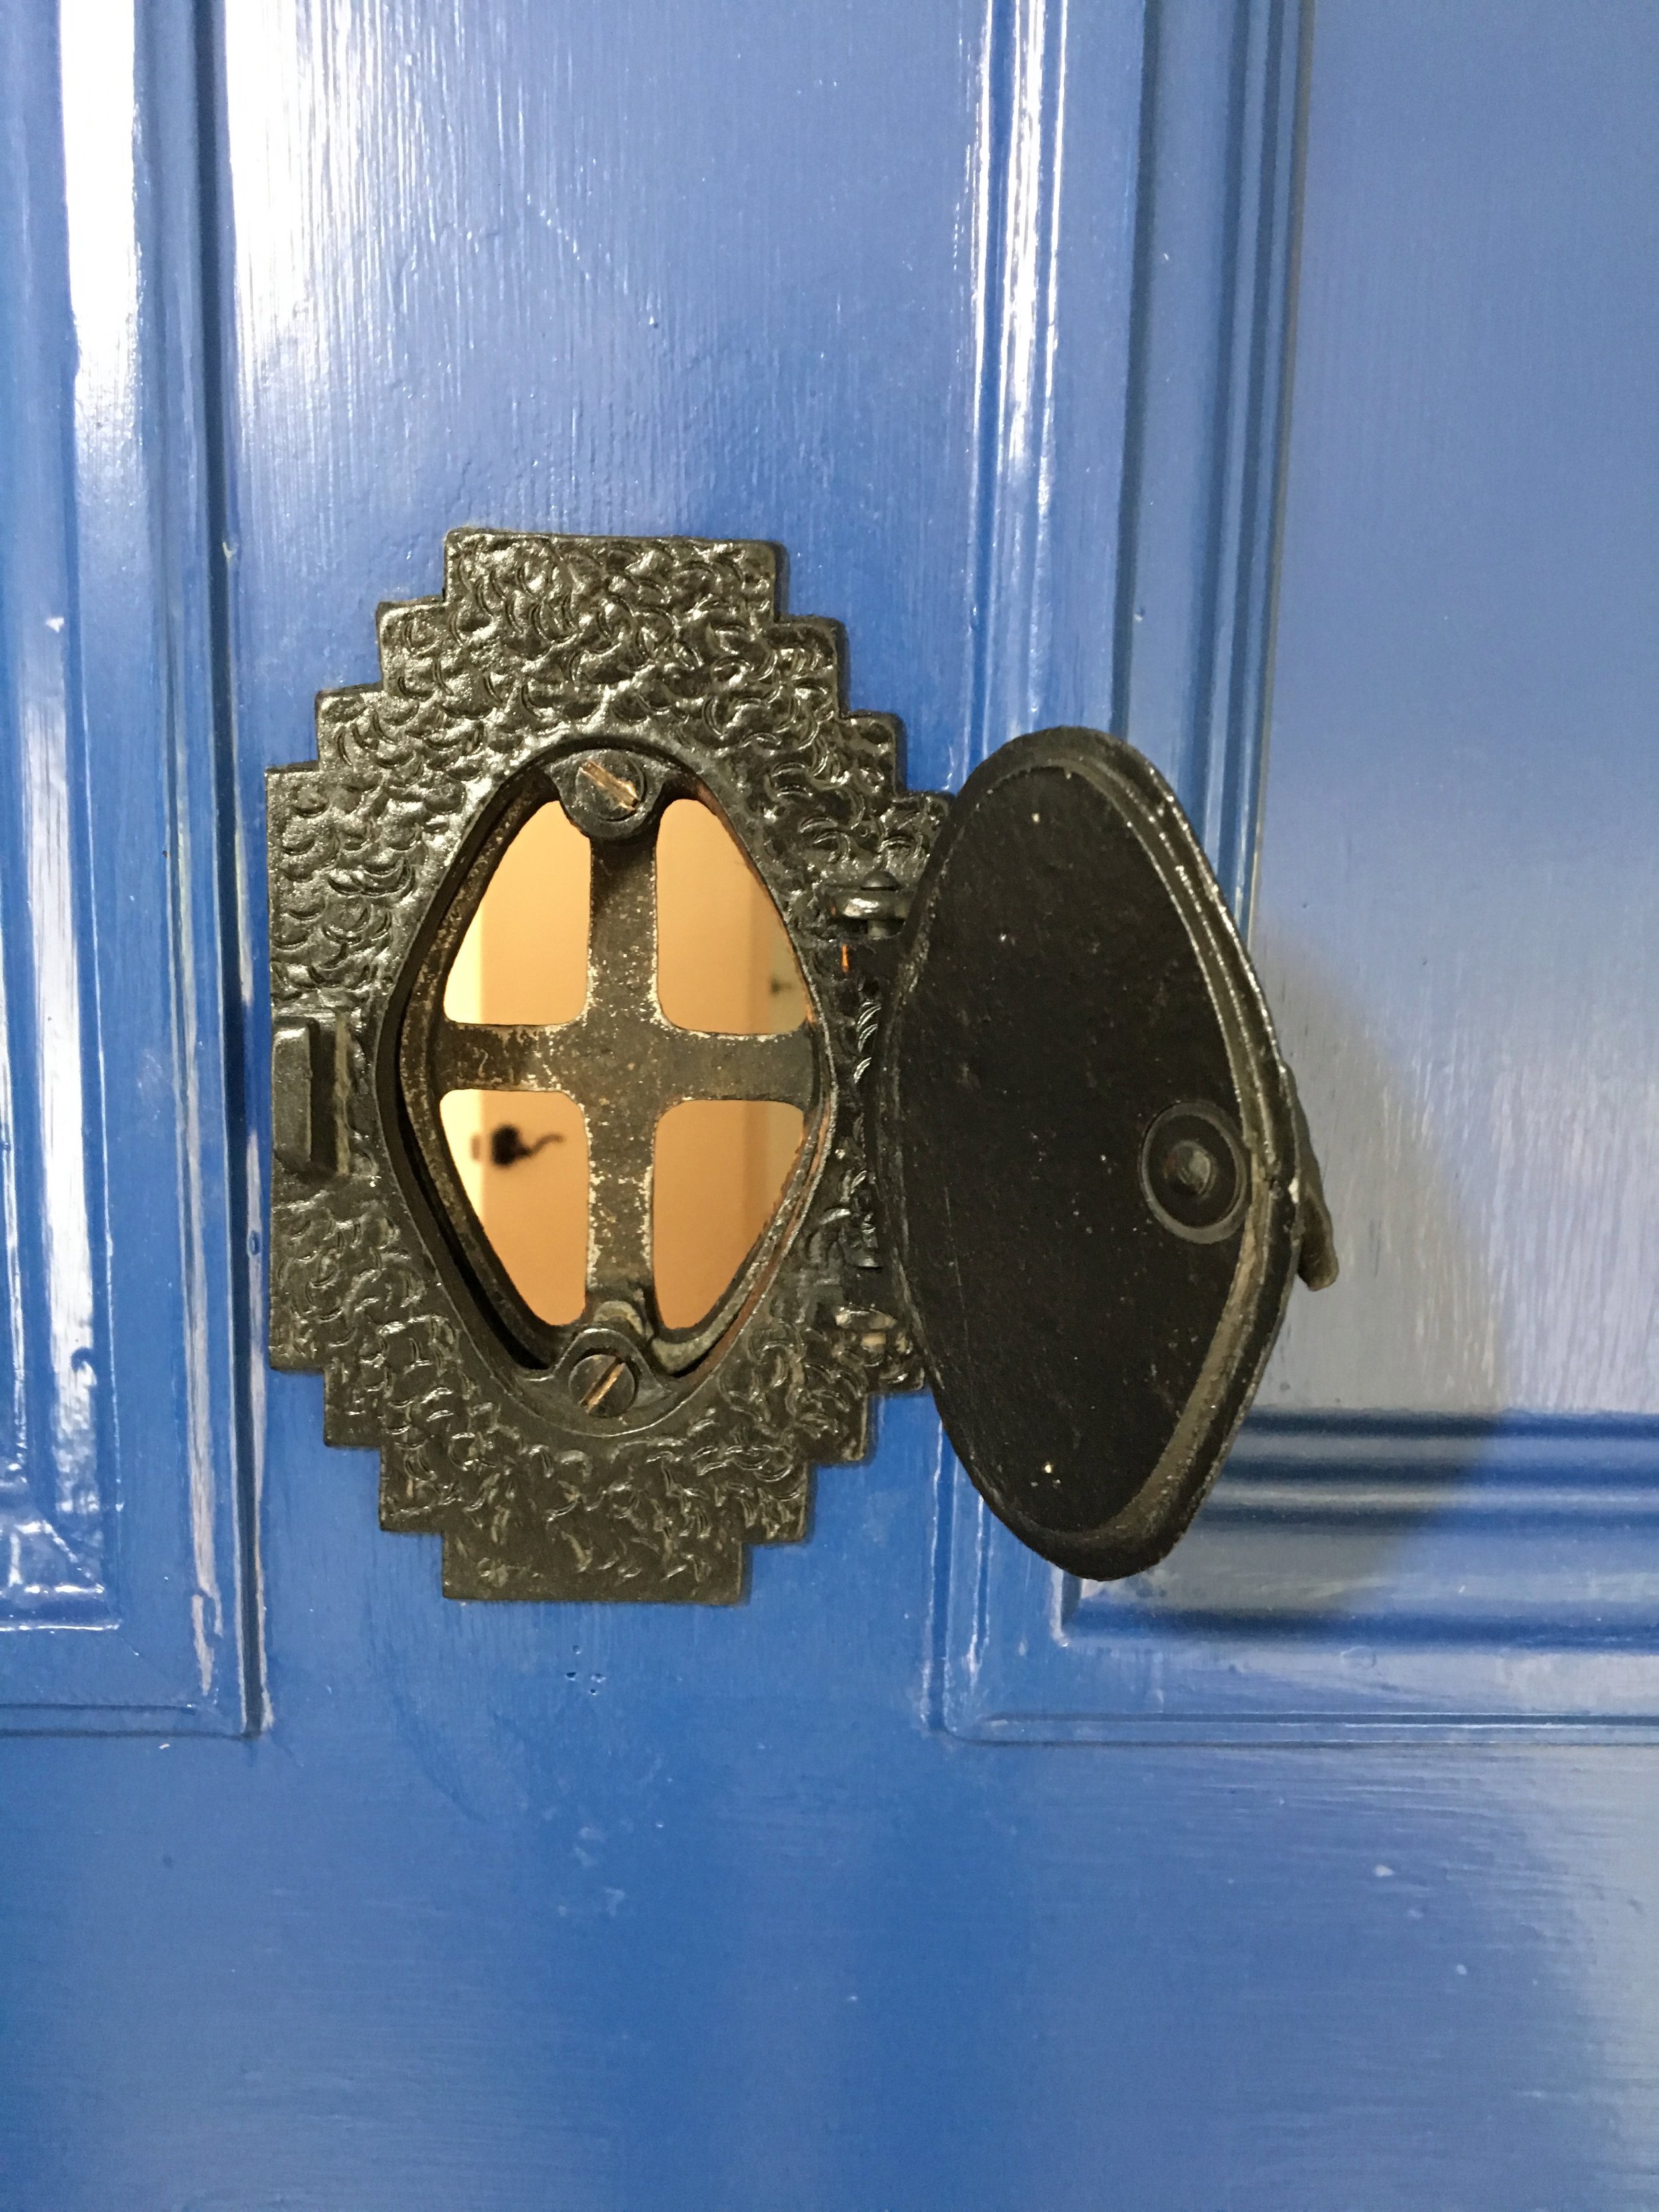
But, before that, the speakeasy needed to be recessed so it would pass on the wall side of the guest room when it was completely open and not scar the wall.  My husband needed to chisel out the stepped configuration of the speakeasy to match and make the depth flush with the exterior of the door.

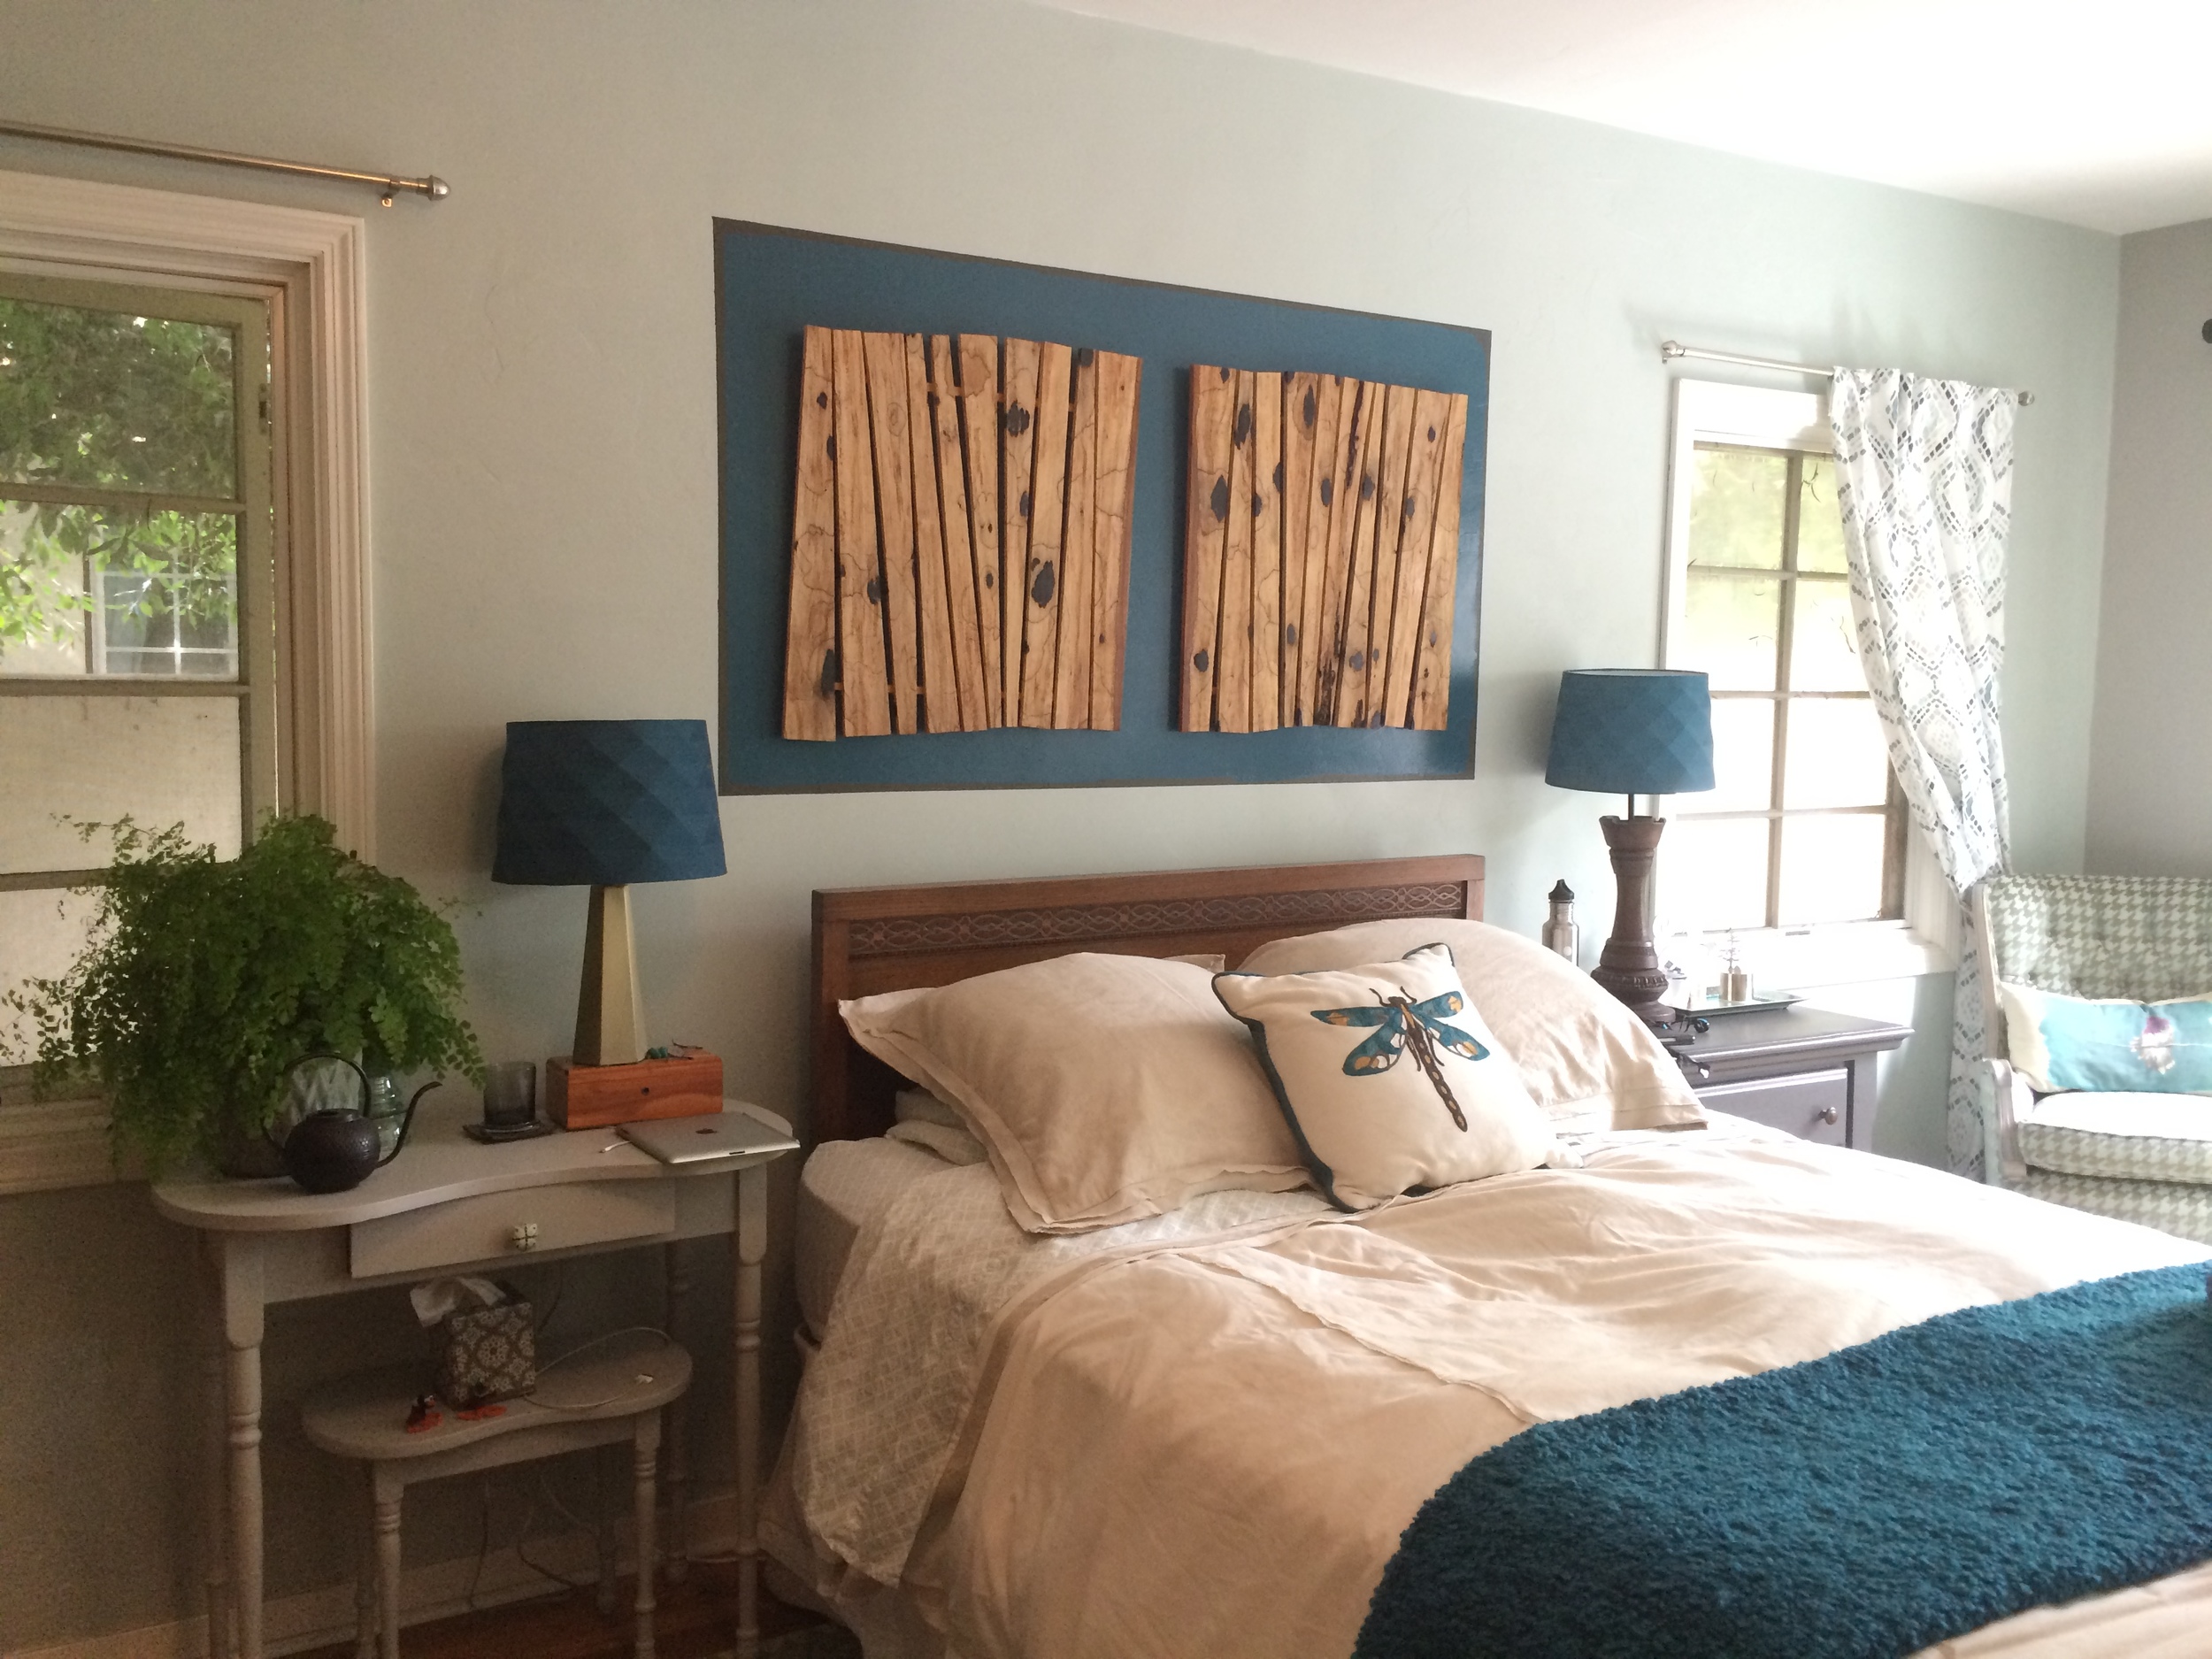
Now, it was ready for some heavy duty priming.  I used an oil based primer, since it offers the best coverage and would prevent any ghosting of previous colors.  Priming and painting took time, since both sides of the door needed to be painted, and with this winter and all the glorious rains, it was a challenge to get good drying time.  I wanted the door painted two different colors, since one side would face my husband’s office, it would be white to match the trim in that room.  On the guest room side, I decided that I would set it up like the entry door it had been in its glory days.  Painting it the same color as the sleeping alcove, a deep blue, against a cool, pale blue on the walls outside of the sleeping alcove, allowed it to stand out on its own as a showpiece.

I was fortunate to have had a small armoire, complete with hanging space, shoe rack, shelves and drawers; perfect for the space on one side of the door.  The other side of the door was large enough for some kind of furniture piece, and went back and forth about what would be the most serviceable.  I finally found a small dresser that looked more like an entry console, perfect!  It is small enough not to crowd the available space and large enough to be serviceable for storage of sheets and towels, until guests come and then it serves well for their clothing storage; one guest gets the “closet” and one gets the dresser, they share the hanging space.

With a generous platform serving as the step down, it feels more comfortable than a small awkward step, and there is an electrical outlet in the riser for plugging in an additional lamp by the chair.

Flooring, operable windows, and at the air conditioning unit will be the next big expenses.  Guests say the room is quite comfortable, except that the newest cat can open the door!  So, maybe it is not so private after all. 

An Entry With A Little Pizzaz

This is a good news, bad news dilemma.  The good news was that we have an actual entry in our little house, something that has always been important to me.  I suppose it is because my father always wanted one in our 1950s house, but by then entries were given up in favor of more living space elsewhere in the home.  We had a covered front stoop; and eventually, my father enclosed it and made a formal entry to our little home.  

The bad news regarding our entry was that it was tiny and dull.  It was painted the same color as the living room— a color that I love; but since the entry was so small, I felt it needed to have a little pizzaz.  In truth, as you enter the house, you never see the only wall that does not have a door in it or an opening to the living room.  

As I sit in my office and look out across the living room, I can see into our dining area with windows that give me a view of our mountains, and into the living room, as well as the one wall in the entry where the only interest on the wall— the three brass pipes that give tone to the door bell, but they are not very interesting.

What to do?  I pondered this question for a short time, thinking paint is the quickest solution to my problem; but I was not certain that paint would be enough.  I remember, when we first saw the house, I was thinking I could put a gatelegged table in that space.  Then I realized there was no space for any furniture, paint would have to be enough.

This thought left me so unsatisfied that, I began thinking around my depth problem and decided I would find an image of an entry table and tape it on the wall to trace it with a chalk pen.  After finding the perfect table for my aesthetic, I took it to a photocopy store and had the staff enlarge the image.  This proved not so simple, since the aspect was not quite right.  I ended up taking the image the photo shop provided, and cut the legs crosswise and extended them to table height—voila!  Since I did not expect the table to be taken seriously, its rangy legs were not an issue.

I used chalkboard paint on the wall and a chalk crayon to get the image onto the wall.  Actually, I had an artist friend come over and draw the outline, thinking that if I did not like it, she could draw something that would be suitable.  It turned out that I liked it, as it was, not perfect, and a bit whimsical.  

Entries are important in homes, and I have spent quite a few hours creating them in my client’s homes, when there is not a designated entry with traditional walls.  Entries can be “imagined” into rooms that open directly into a living space, by placing a large table to stop guests from simply walking all the way into a room upon entering.  A decorative screen can also be used to stop the eye from roaming about the family living space, and sometimes a bold paint color will serve to delineate an entry space.

An entry gives a homeowner a sense of privacy to anyone coming to your door, either invited or not.  Sometimes, a homeowner may not want to have a visitor actually enter personal living space, so an entry is a way to hold them to a more confined area, even from looking in from the outside.

I am so happy to have my little entry, and now I love it even more that it offers some interest to me and my guests, once they come into the house.  More likely, visitors will not see my little table until they leave; nevertheless it is more interesting than bland walls.

Spalted Maple Artwork

The wonders of nature never cease to amaze me.  On our trip to the wine country last month, my daughter and I visited a gallery and were mesmerized by some of the collections; but what captivated us and held our attention was the spalted maple turned to art.

The gallery representative was anxious to tell us that spalted wood is caused by a fungus that occurs primarily in dead trees, and the artist is careful to use only felled trees. 

Spalted wood is divided into three types: pigmentation, white rot and zone lines.  The artwork that my daughter bought is zone line spalting, which is characterized by thin lines of black surrounding heavy, black, irregular spots that appear very hard, almost like stone, called dark mycelium.  While all this is somewhat technical, the effect on the wood is simply beautiful, almost like thin ink lines shakily drawn around the heavy black spots.  In the gallery exhibit, the wood was cut into unevenly sliced slats and mounted on thin strips of wood to hold the piece together.  

My daughter bought the two pieces that were in the gallery to place over her bed’s headboard.  I suggested we paint a solid rectangle on the wall a very dark color to form a frame and place the work inside, the rectangle, of course, being larger than the two pieces together.  We did that, but once the art was up on the wall, it seemed too flat.  My daughter wanted more color, so we repainted the rectangle right over the original color, but without care to cover the sharp lines completely, while staying within the original shape.  She thought she would like to add a frame of molding to the painted on wall and paint it the same color, for texture.  Then she decided the irregular color on top of the dark color was interesting and she would leave it for the time being.

Artwork, of course, is a matter of very personal choice; fortunately we share similar tastes.  Her room is coming together nicely and I think she is beginning to feel it is just about right.

If you look up spalted wood on the Internet, you will see some amazing pieces of art, that are not only beautiful but useful too.  Spalted wood is used for musical instruments, bowls, tables and cabinets.  Some of the images show inlays of turquoise and metals.  Artists find uses for this wood in jewelry and furniture; their creativity seems endless.  Please be sure to take a look, next time you are at your computer, I think you will be amazed at this oddity of nature.

Reclaimed Wood Shelves

The pretty bathroom that we added onto my daughter’s house a couple of years ago has been finished for sometime, with the exception of some reclaimed wood shelves she had always wanted to add.  We spent some time researching reclaimed wood, drove to a salvage business in downtown Los Angeles, and found what might be a good fit.  Then, as other projects moved forward, the salvaged shelves were put on hold.  

Finally, the wood was purchased, and the shelves were added to the area above the commode.  My daughter wanted this rustic look to relate to the natural weave of her laundry basket and to add some relief to the fancy turned legs of the reclaimed dining room buffet we made into her vanity with the addition of a vessel sink.   The beautiful faucet set and vanity, along with the custom tile band for the shower, are the show stoppers in the bathroom.

The ceilings are tall in her 1930s Spanish home, and my daughter felt the commode area needed a little special attention.  She added the stenciling on the commode wall for a little sparkle, which adds to the elegance of the rest of the bathroom; the rustic shelves are a juxtaposition to this design element.

Dressing the shelves was the next project.   We found a fun little wire basket at the “Junk Bonanza” in Del Mar a couple of weeks ago in which she could store her spare bath towel.  Then she added some of her favorite things from trips abroad and down under.  The memorabilia are a nice reminder of fun trips and outings with friends and family.

Additionally, we picked up some fun pieces during our salvaging outings.  We picked up vessels for planting succulents on the patio along with an old bedspring she will use as a planting screen for added privacy behind her outdoor patio furniture.  I will share more about these and other items in another article, so stay tuned for more of our salvaging exploits.